Post by AngelMare on Nov 26, 2008 13:25:30 GMT -7
Tutorial for GIMP
This tutorial is designed for Windows. If you have Mac, you have to be smarter to complete this tutorial. [img src="http://www.howrse.com/media/sowcle/image/themes/default/smileys/![]() www.howrse.com/media/sowcle/image/themes/default/smileys/(6).gif"].gif[/img]
www.howrse.com/media/sowcle/image/themes/default/smileys/(6).gif"].gif[/img]
Some of you may not be good at drawing horses, so you can create a base from a horse image instead.
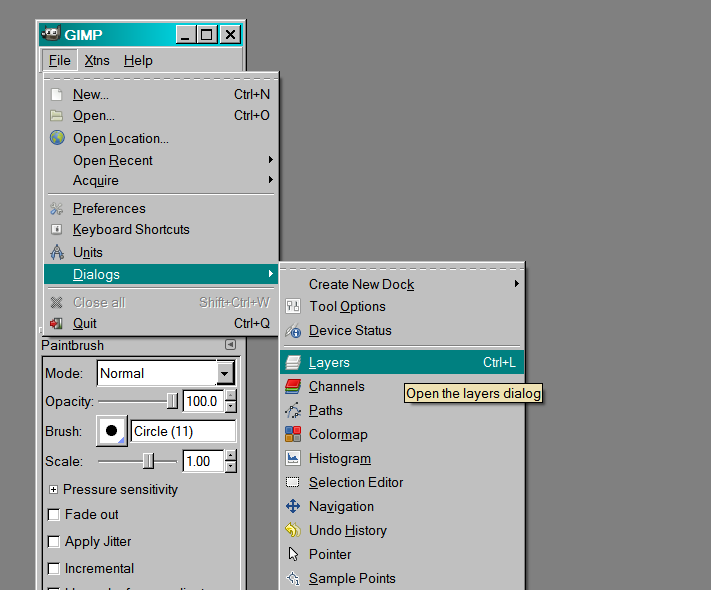
Open up GIMP. If you do not have the layers dialog, get it by going to File>Dialogs>Layers.
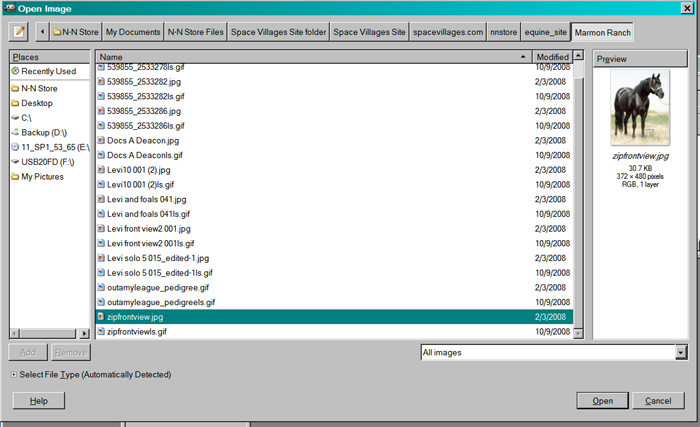
Open up an image from your computer by clicking File>Open… (or ctrl+O on Windows) and browsing your folders until you find the image, then click Open.
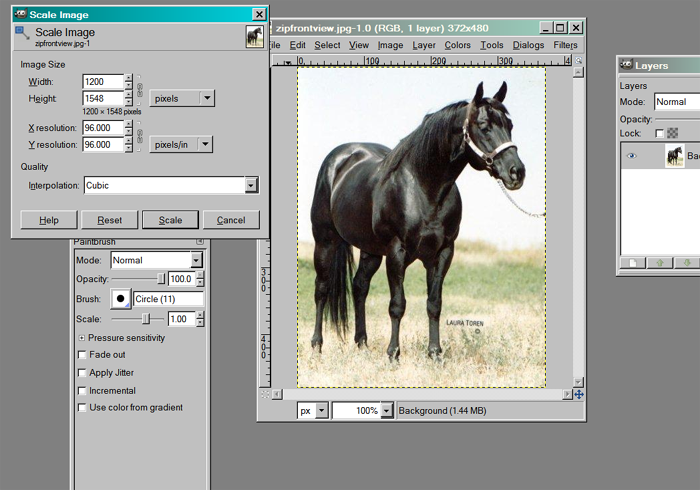
Go to Image>Scale Image… and change the Width to 1200 so you have a larger image to work with. The Height should change automatically to keep the image in perspective.
Save the image as .psd, and as you work, hit ctrl-s to save the file every once in a while.
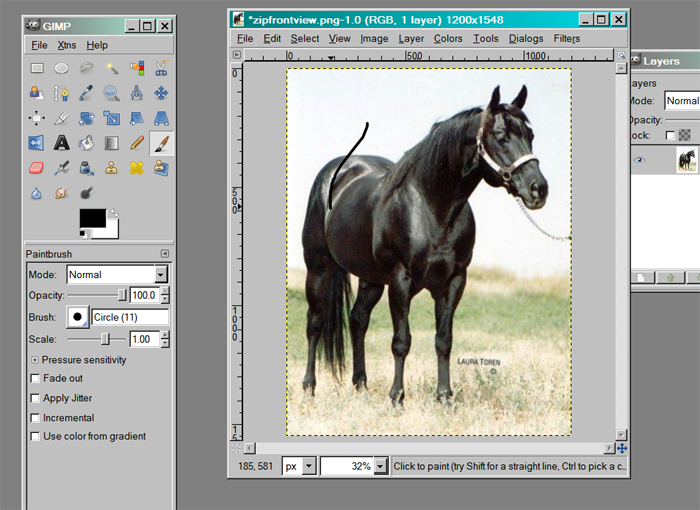
Select the Paintbrush and choose the type of stroke you want for your base. Feel free to test it out on the image as I have done, but be sure to hit ctrl-z to undo it when you are finished looking at it.
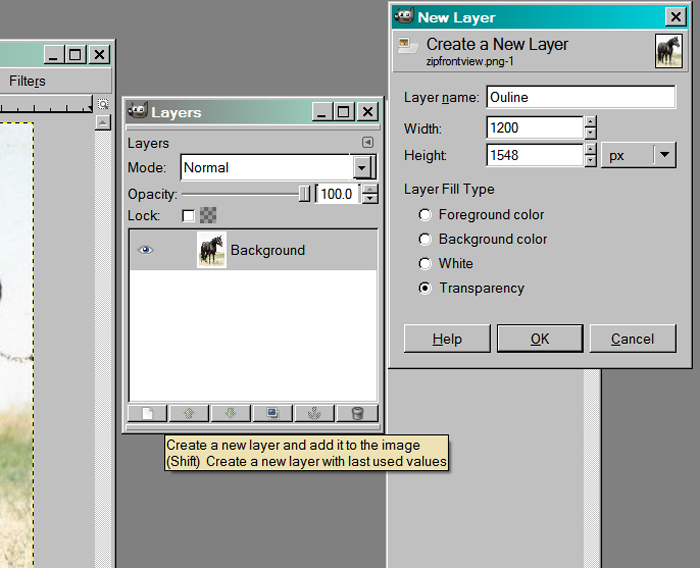
Create a new layer by clicking the button on the layer dialogue box that is at the bottom to the furthest left. Name the layer something like Outline, and be sure it is transparent.
Use the Zoom tool to zoom into the image where you want to work with at the moment.
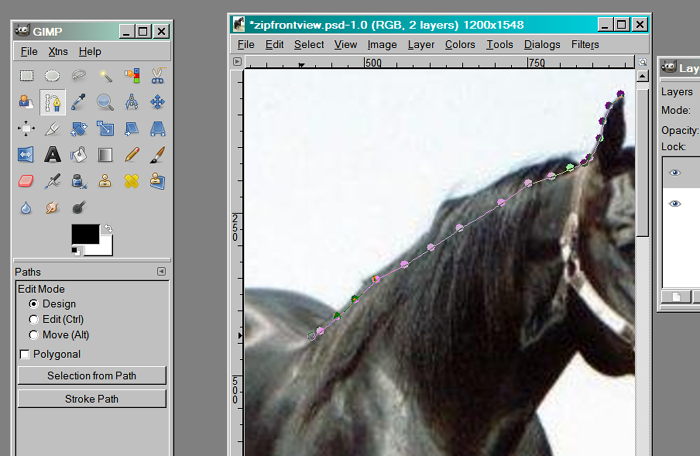
Select the Paths Tool and begin outlining the image by clicking at where you want to place the dots which will automatically be connected together.
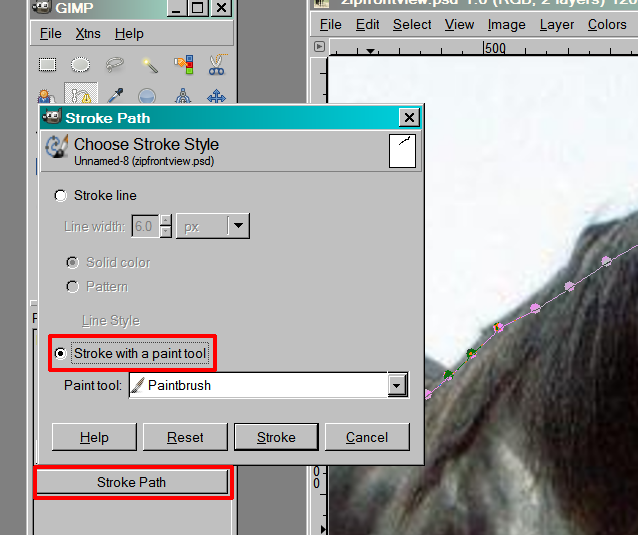
When you are finished with your line, click Stroke Path on the main dialog, and choose Stroke with a paint tool, which you want to be Paintbrush. Click on another tool (any will do), then reselect the Paths Tool. Your line should now be filled with the stroke you chose for your paintbrush. You can always change the paintbrush stroke by selecting the paintbrush again.
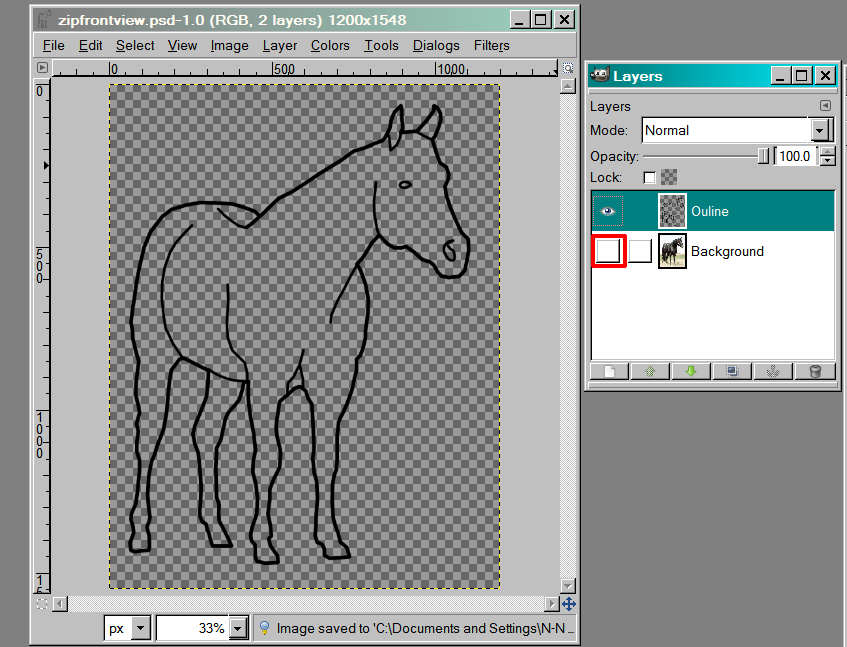
You can click on the little eye icon of the background layer in the layer dialog to temporarily hide it so you can see your base.
Depending on what you want to do with the base, you can either go on to coloring it (another tutorial) or you can save it as a .jpg to be used on the web or whatever else. If it’s saved as .psd you will not be able to do anything with it except in GIMP or Photoshop.
Coloring in a Base
This tutorial is designed for Windows. If you have Mac, you have to be smarter to complete this tutorial. [img src="http://www.howrse.com/media/sowcle/image/themes/default/smileys/
Some of you may not be good at drawing horses, so you can create a base from a horse image instead.

Open up GIMP. If you do not have the layers dialog, get it by going to File>Dialogs>Layers.

Open up an image from your computer by clicking File>Open… (or ctrl+O on Windows) and browsing your folders until you find the image, then click Open.

Go to Image>Scale Image… and change the Width to 1200 so you have a larger image to work with. The Height should change automatically to keep the image in perspective.
Save the image as .psd, and as you work, hit ctrl-s to save the file every once in a while.

Select the Paintbrush and choose the type of stroke you want for your base. Feel free to test it out on the image as I have done, but be sure to hit ctrl-z to undo it when you are finished looking at it.

Create a new layer by clicking the button on the layer dialogue box that is at the bottom to the furthest left. Name the layer something like Outline, and be sure it is transparent.
Use the Zoom tool to zoom into the image where you want to work with at the moment.

Select the Paths Tool and begin outlining the image by clicking at where you want to place the dots which will automatically be connected together.

When you are finished with your line, click Stroke Path on the main dialog, and choose Stroke with a paint tool, which you want to be Paintbrush. Click on another tool (any will do), then reselect the Paths Tool. Your line should now be filled with the stroke you chose for your paintbrush. You can always change the paintbrush stroke by selecting the paintbrush again.

You can click on the little eye icon of the background layer in the layer dialog to temporarily hide it so you can see your base.
Depending on what you want to do with the base, you can either go on to coloring it (another tutorial) or you can save it as a .jpg to be used on the web or whatever else. If it’s saved as .psd you will not be able to do anything with it except in GIMP or Photoshop.
Coloring in a Base
