|
|
Post by AngelMare on Nov 26, 2008 13:59:34 GMT -7
Tutorial for GIMPThis tutorial is designed for Windows. If you have Mac, you have to be smarter to complete this tutorial. [img src="http://www.howrse.com/media/sowcle/image/themes/default/smileys/ ![]() www.howrse.com/media/sowcle/image/themes/default/smileys/(6).gif www.howrse.com/media/sowcle/image/themes/default/smileys/(6).gif"].gif[/img] Ok, so you have your base. Now what? 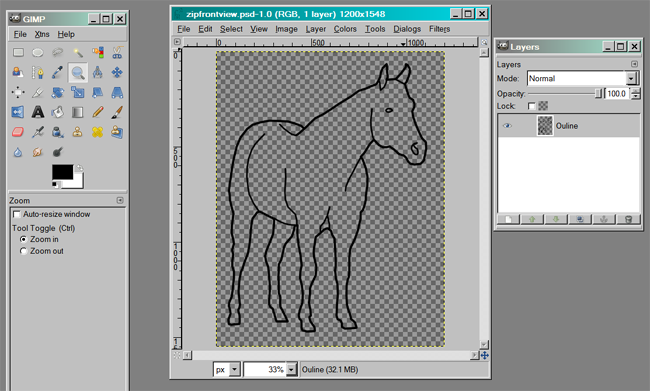 For this part, I will be using the base that I created in the tutorial for making a base from an image. I have deleted the background layer, and again I am having it saved as .psd when working with it. 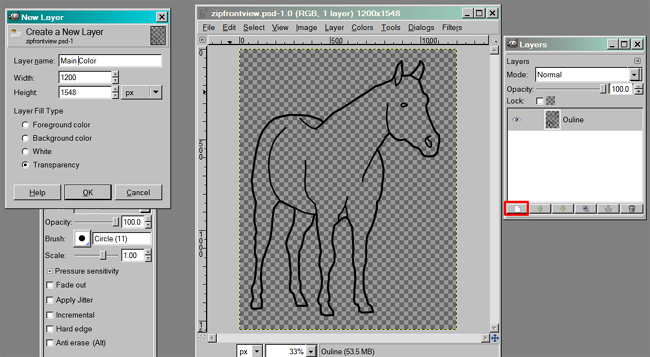 I now create a new layer and name it Main Color. 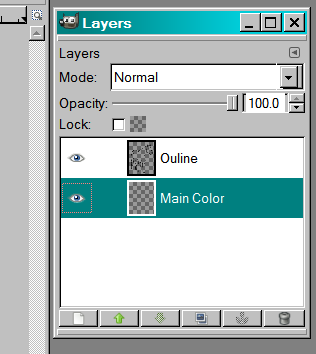 Click and drag this layer below the Outline layer. 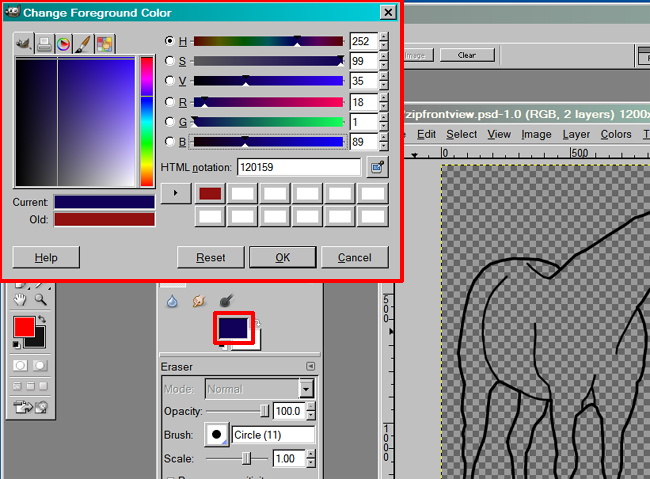 Click the foreground icon and play around with the color sliders to find the color you want as your primary color.  Then click ok and use the Bucket Fill Tool to fill in the Main Color layer. 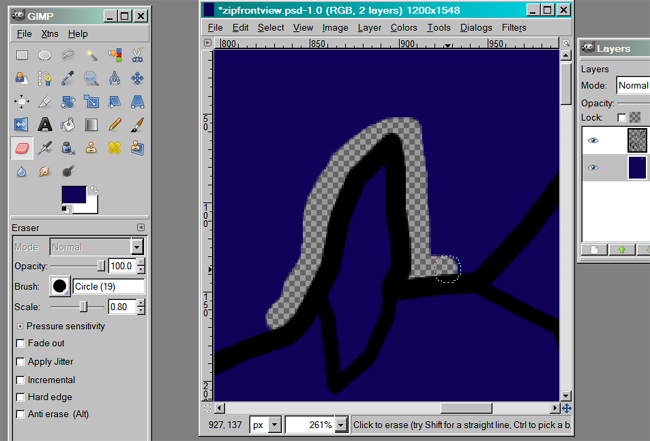 Select the eraser tool and choose the size of the “brush.” The closer you are to the outline, the smaller it should be, and the further you are from it, the larger it can be. I recommend a “hard” brush like Circle (19) instead of some other calligraphic or fancy brushes. 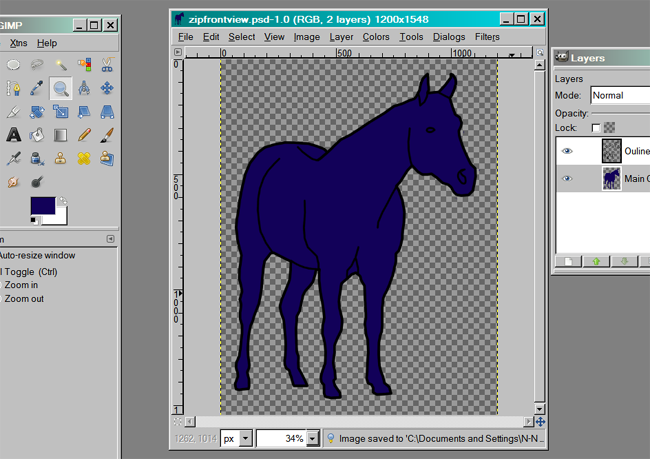 Carefully erase around the outline and get rid of all the color surrounding it. Be sure to get every piece of color surrounding it, or it will not be accepted by Howrse since it will not be in the “right format” or will not be “following the rules.” To color certain parts of the horse, like the hooves, or to make a paint horse, experiment with the paintbrush and see what you come up with. Creating a Base from an Image - Shading |
|

