Post by AngelMare on Mar 19, 2009 7:41:25 GMT -7
Before a coat can be submitted to the Black Pearl, it must be placed correctly on Howrse's standard background. I am using theblackyear's coat; stealing it will result in a loss of 10 karma, so steal at your own risk. [img src="http://www.howrse.com/media/sowcle/image/themes/default/smileys/![]() www.howrse.com/media/sowcle/image/themes/default/smileys/(6).gif"].gif[/img] *cackles*
www.howrse.com/media/sowcle/image/themes/default/smileys/(6).gif"].gif[/img] *cackles*
This tutorial is made for Adobe Photoshop.
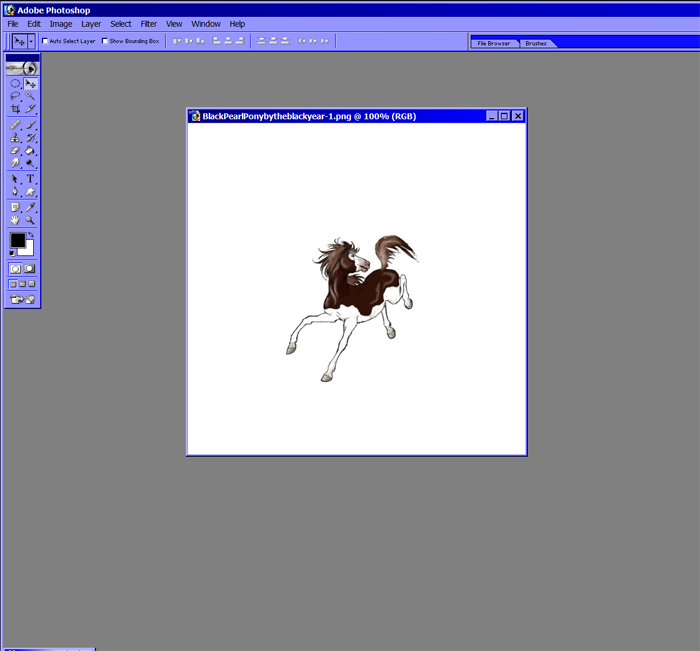
1. Open your image.
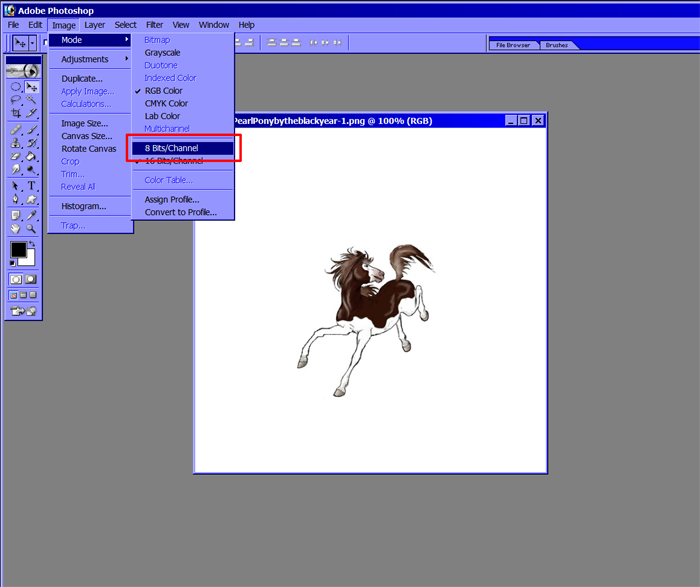
2. Here, Photoshop is giving me an error, saying that I can't work with this image because it is in 16-bit channel, so as you can see here, I change it to 8-bit channel.
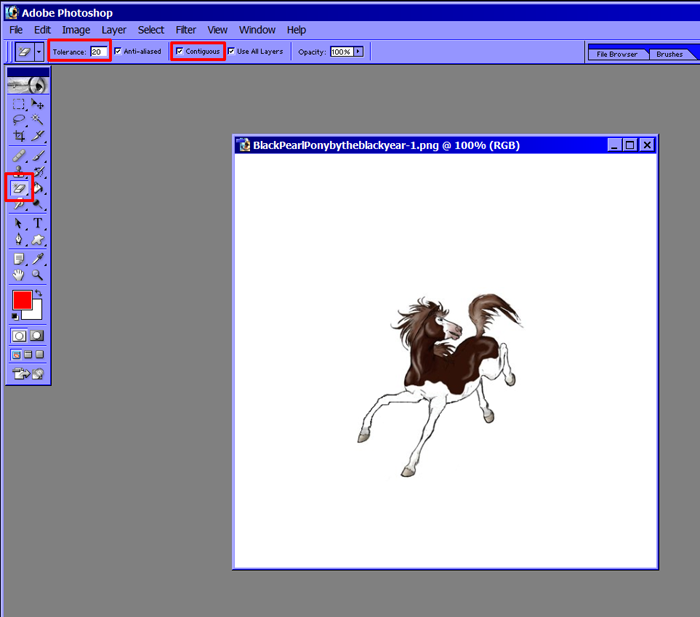
3. Now, get the magic eraser tool: it's the eraser with the little star. Be sure that you have contiguous checked, and you may want to adjust the tolerance, which will determine how strongly it will delete the white, if that makes sense. [img src="http://www.howrse.com/media/sowcle/image/themes/default/smileys/![]() www.howrse.com/media/sowcle/image/themes/default/smileys/xD.gif"].gif[/img]
www.howrse.com/media/sowcle/image/themes/default/smileys/xD.gif"].gif[/img]
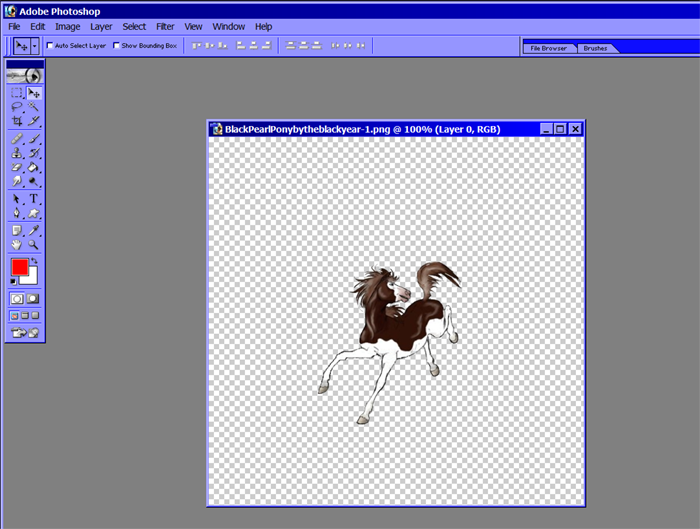
4. With the magic eraser tool selected, you click on the white, which will erase it. When anything is transparent in photoshop, it will be gray and white checkered.
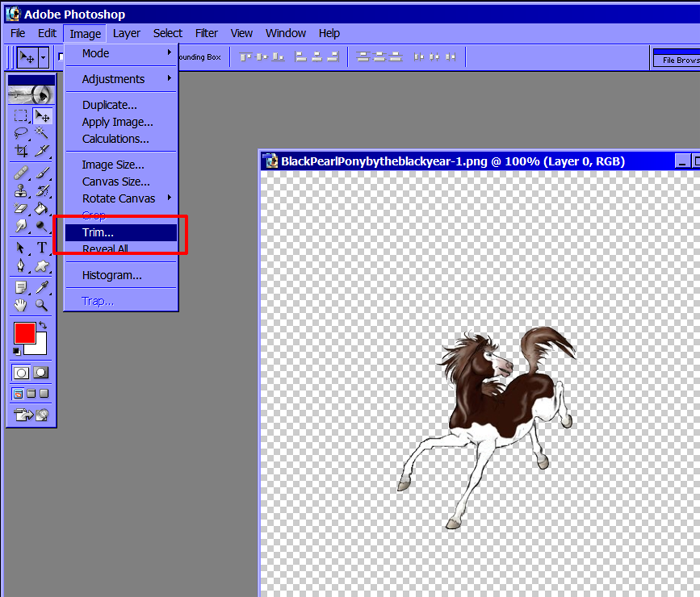
5. Now, you will want to trim the image, which will get rid of all the unnecessary transparency.
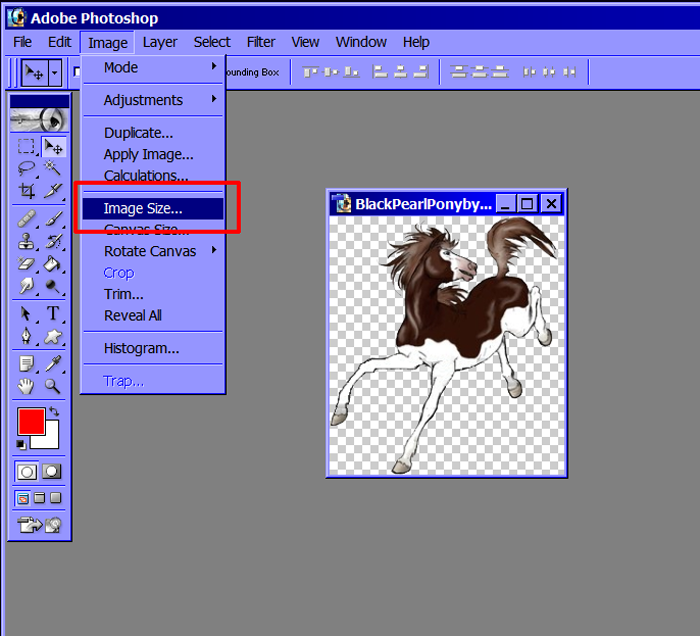
6. Next you will want to check the coat's size, and adjust it if necessary.
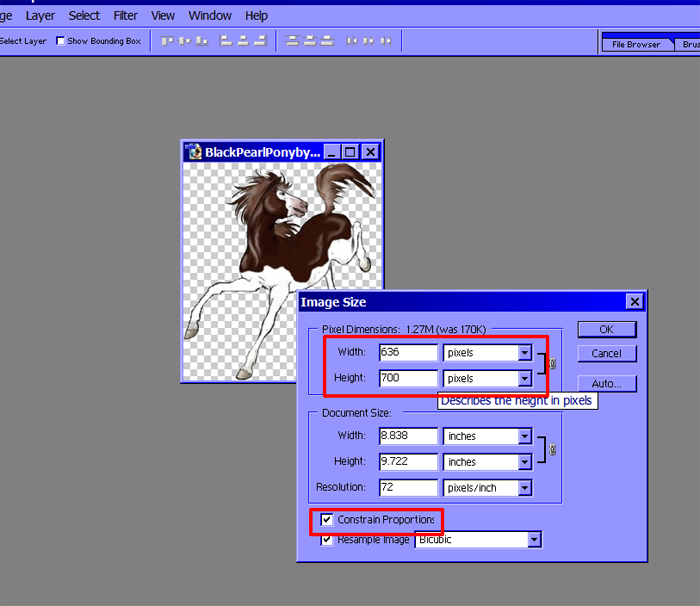
7. For adjusting the size, make sure that "constrain proportions" is checked. Then, you will want both the coat's height and width to be within 690 pixels. This coat was too small, and its height was much greater than its width, so I changed its height to 690, which automatically adjusted the width.
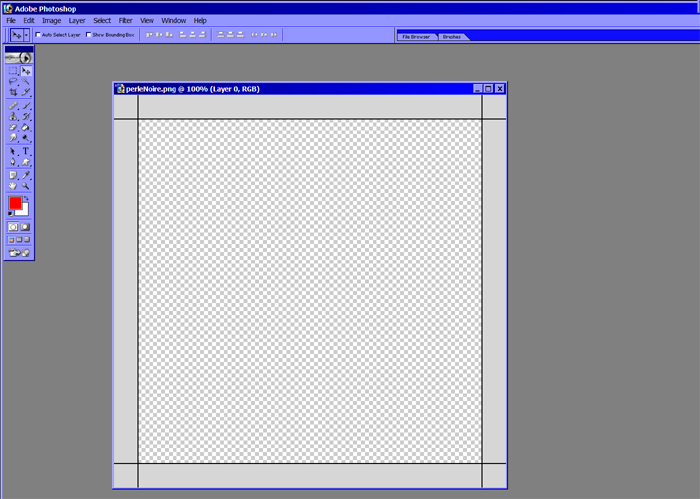
8. Now open the "standard background" file. It will be in .png file. Be sure to save the image from Howrse, rather than copy and paste. You can do this by right-clicking, and Save as. It will be named perleNoire.png on you PC unless you name it something differently.
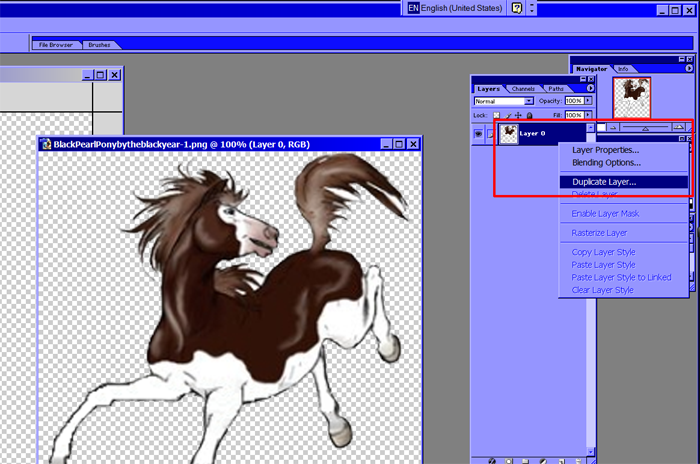
9. Go back to your coat, and be sure you have the Layers Palette open. Right-click on the layer of your coat (hopefully the only layer) and choose Duplicate Layer.
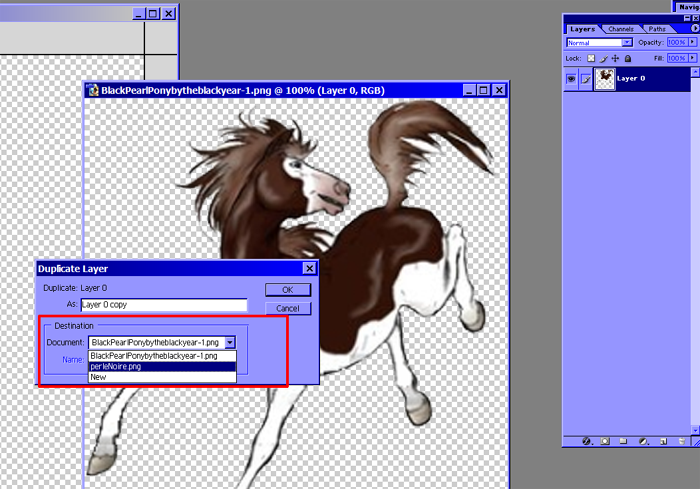
10. In the dropdown box, choose the "perleNoire.png" file, and click ok.
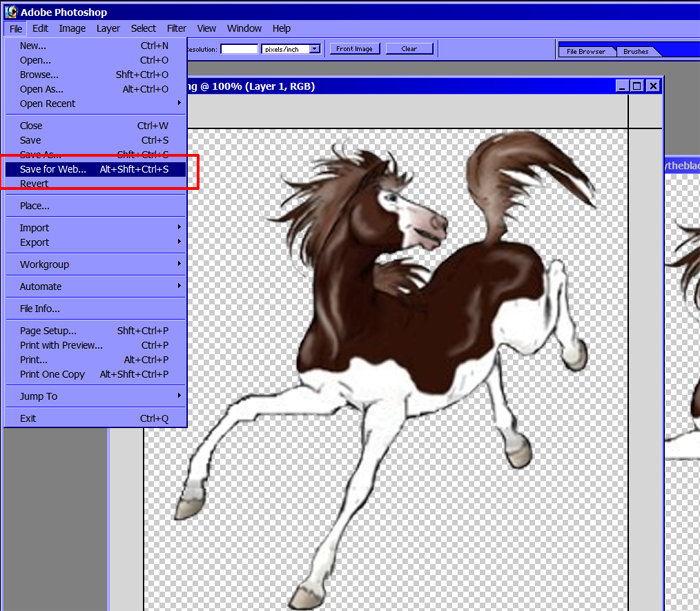
11. Now go File>Save for Web.
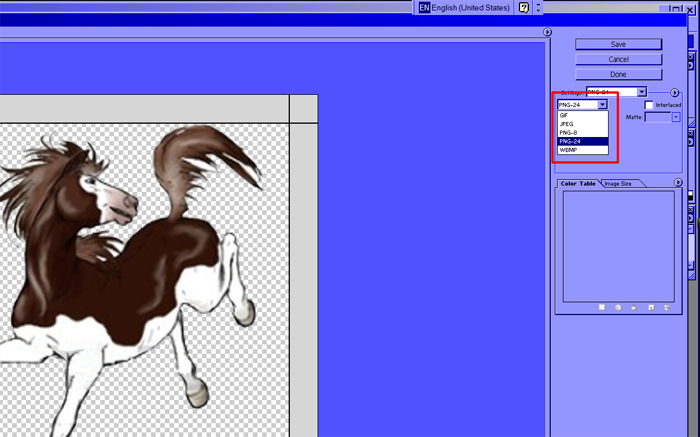
12. Next there will be a dropdown box for you to select which format the file should be saved as. Choose PNG-24, click Save, name the file, and your coat should be ready for the black pearl! [img src="http://www.howrse.com/media/sowcle/image/themes/default/smileys/![]() www.howrse.com/media/sowcle/image/themes/default/smileys/(a).gif"].gif[/img]
www.howrse.com/media/sowcle/image/themes/default/smileys/(a).gif"].gif[/img]
If you have any problems or questions, PM me here, on Howrse, or post here (guests welcome).
This tutorial is made for Adobe Photoshop.

1. Open your image.

2. Here, Photoshop is giving me an error, saying that I can't work with this image because it is in 16-bit channel, so as you can see here, I change it to 8-bit channel.

3. Now, get the magic eraser tool: it's the eraser with the little star. Be sure that you have contiguous checked, and you may want to adjust the tolerance, which will determine how strongly it will delete the white, if that makes sense. [img src="http://www.howrse.com/media/sowcle/image/themes/default/smileys/

4. With the magic eraser tool selected, you click on the white, which will erase it. When anything is transparent in photoshop, it will be gray and white checkered.

5. Now, you will want to trim the image, which will get rid of all the unnecessary transparency.

6. Next you will want to check the coat's size, and adjust it if necessary.

7. For adjusting the size, make sure that "constrain proportions" is checked. Then, you will want both the coat's height and width to be within 690 pixels. This coat was too small, and its height was much greater than its width, so I changed its height to 690, which automatically adjusted the width.

8. Now open the "standard background" file. It will be in .png file. Be sure to save the image from Howrse, rather than copy and paste. You can do this by right-clicking, and Save as. It will be named perleNoire.png on you PC unless you name it something differently.

9. Go back to your coat, and be sure you have the Layers Palette open. Right-click on the layer of your coat (hopefully the only layer) and choose Duplicate Layer.

10. In the dropdown box, choose the "perleNoire.png" file, and click ok.

11. Now go File>Save for Web.

12. Next there will be a dropdown box for you to select which format the file should be saved as. Choose PNG-24, click Save, name the file, and your coat should be ready for the black pearl! [img src="http://www.howrse.com/media/sowcle/image/themes/default/smileys/
If you have any problems or questions, PM me here, on Howrse, or post here (guests welcome).
