

Post by AngelMare on Mar 19, 2009 8:56:57 GMT -7
Before a coat can be submitted to the Black Pearl, it must be correctly formatted on the "standard background." As with the Photoshop tutorial, I will be using theblackyear's coat as an example, as it is perfect for this reason. [img src="http://www.howrse.com/media/sowcle/image/themes/default/smileys/![]() www.howrse.com/media/sowcle/image/themes/default/smileys/(a).gif"].gif[/img] No stealing, or I shall haunt you forever and 10 karma will be docked and the FBI will arrest you. [img src="http://www.howrse.com/media/sowcle/image/themes/default/smileys/
www.howrse.com/media/sowcle/image/themes/default/smileys/(a).gif"].gif[/img] No stealing, or I shall haunt you forever and 10 karma will be docked and the FBI will arrest you. [img src="http://www.howrse.com/media/sowcle/image/themes/default/smileys/![]() www.howrse.com/media/sowcle/image/themes/default/smileys/*-).gif"].gif[/img]
www.howrse.com/media/sowcle/image/themes/default/smileys/*-).gif"].gif[/img]
Anyhow, this tutorial is for GIMP, a free image editing software that can be downloaded from their site. Just google GIMP.
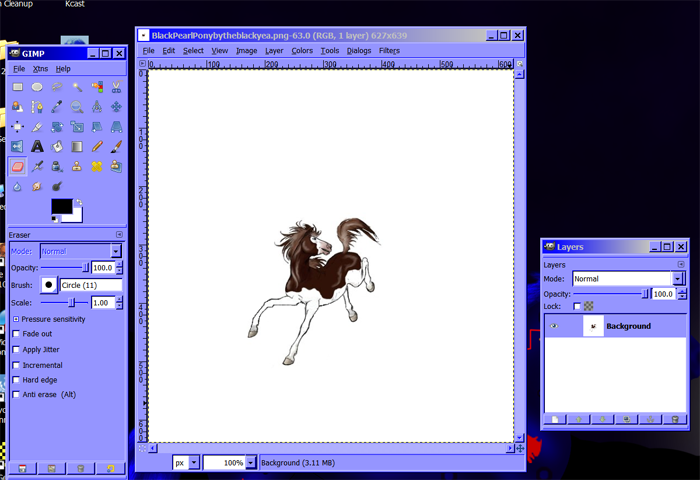
1. Open up your coat file.

2. Select Layer>Transparency>Add Alpha Channel.
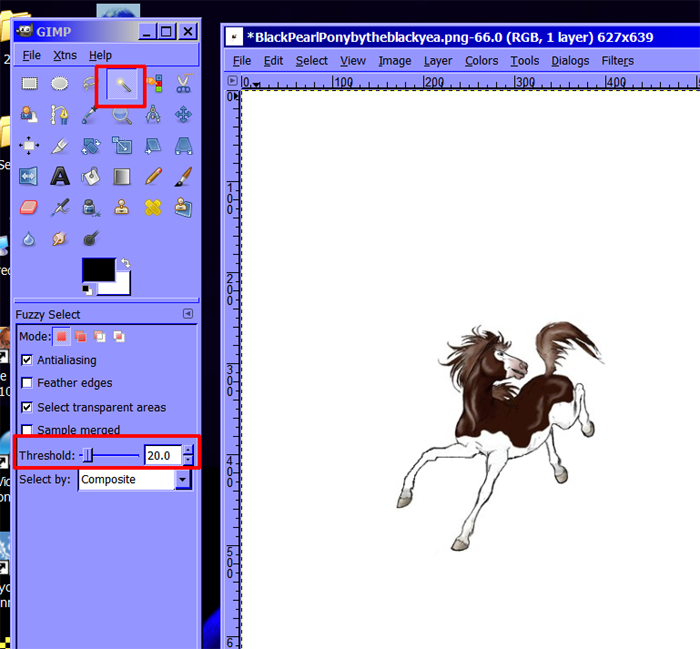
3. Next select the Fuzzy Select Tool. The threshold decides how closely the white will be cut from the coat, so adjust as necessary.
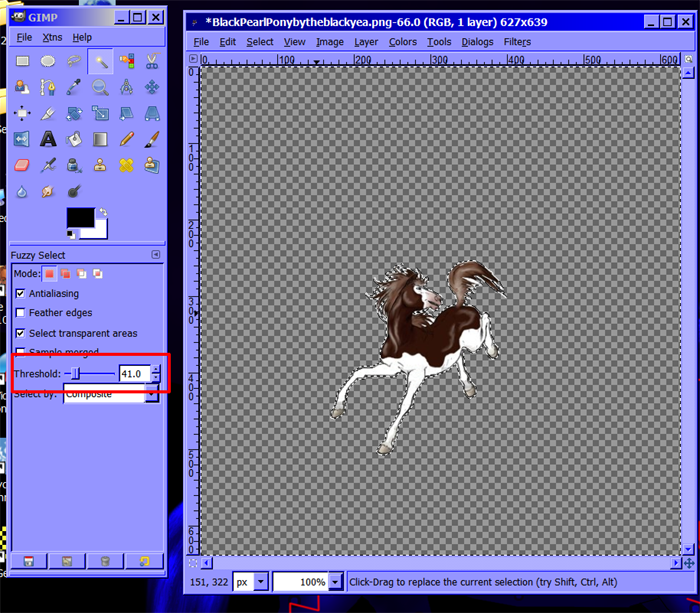
4. Here I clicked on the white, and hit delete. You can see that I had to adjust the threshold, as 20 left some white border around the horse.
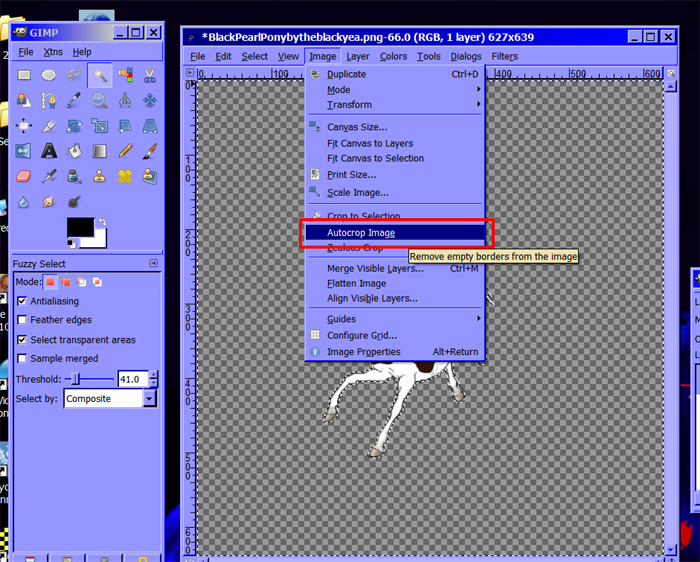
5. Next, select Image>Autocrop Image.
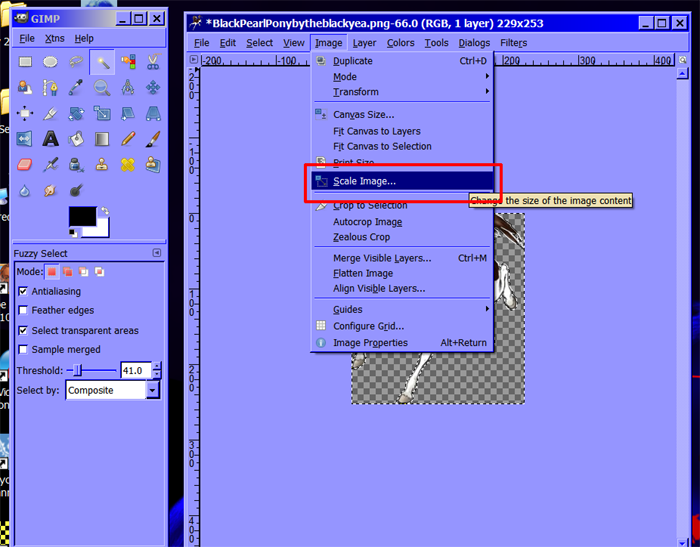
6. Now you will want to get the size right, by going Image>Scale Image...
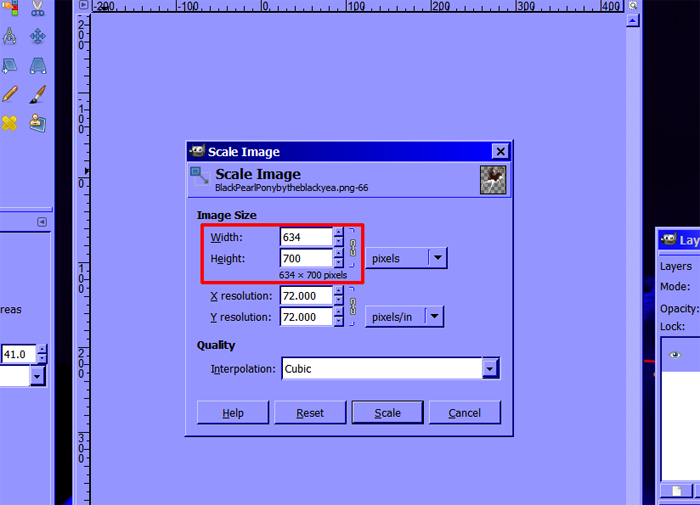
7. The image should be within 690 px wide and 690 px high. So, this coat was higher than it was wide, so I made the height 690px, and the width automatically changed. This is because of the little link to the right of the pixel values; be sure you have this link! After you've done this, be sure to save.
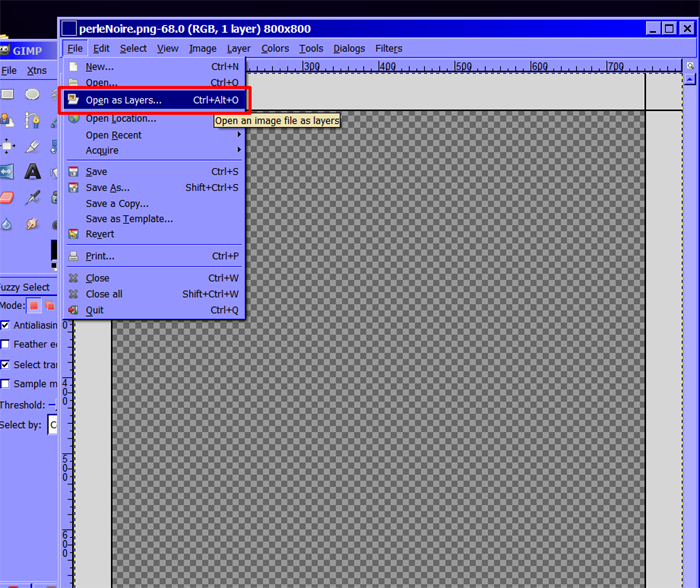
8. Now, open the "standard background" image, which you should have saved to your computer. Select Open As Layers...
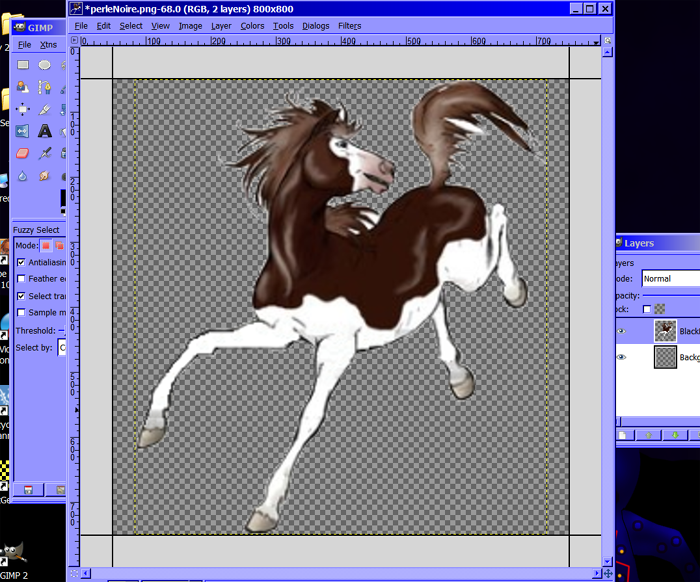
9. Find your coat file, and open it. It should appear on the standard background, within the borders and nicely centered.
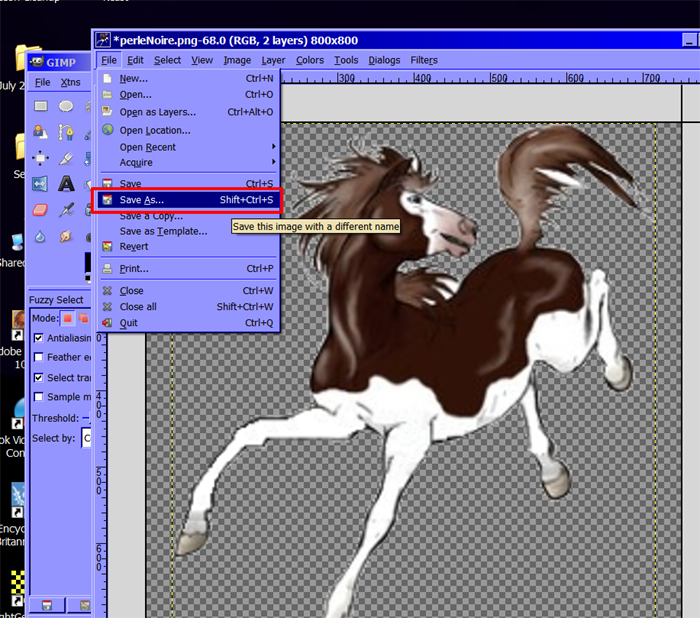
10. Select File>Save As...
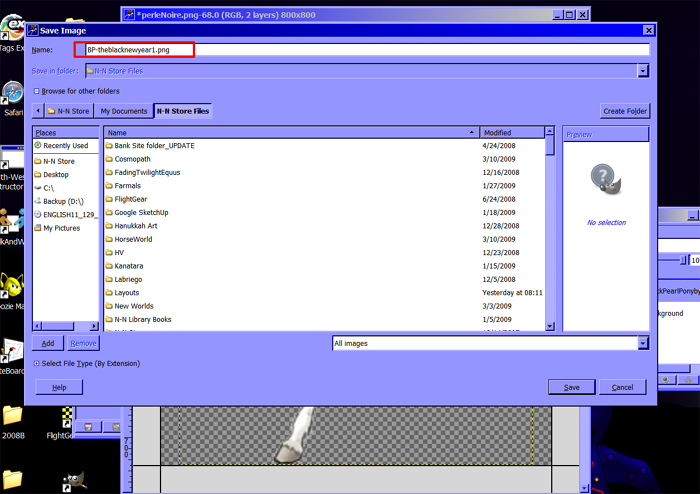
11. Then choose the file's name, and be sure it ends in .png
Your coat should now be ready for the black pearl! [img src="http://www.howrse.com/media/sowcle/image/themes/default/smileys/![]() www.howrse.com/media/sowcle/image/themes/default/smileys/:-)).gif"].gif[/img]
www.howrse.com/media/sowcle/image/themes/default/smileys/:-)).gif"].gif[/img]
If you have any problems or questions, don't hesitate to PM me or post here; guests are welcome to post.
Anyhow, this tutorial is for GIMP, a free image editing software that can be downloaded from their site. Just google GIMP.
1. Open up your coat file.
2. Select Layer>Transparency>Add Alpha Channel.
3. Next select the Fuzzy Select Tool. The threshold decides how closely the white will be cut from the coat, so adjust as necessary.
4. Here I clicked on the white, and hit delete. You can see that I had to adjust the threshold, as 20 left some white border around the horse.
5. Next, select Image>Autocrop Image.
6. Now you will want to get the size right, by going Image>Scale Image...
7. The image should be within 690 px wide and 690 px high. So, this coat was higher than it was wide, so I made the height 690px, and the width automatically changed. This is because of the little link to the right of the pixel values; be sure you have this link! After you've done this, be sure to save.
8. Now, open the "standard background" image, which you should have saved to your computer. Select Open As Layers...
9. Find your coat file, and open it. It should appear on the standard background, within the borders and nicely centered.
10. Select File>Save As...
11. Then choose the file's name, and be sure it ends in .png
Your coat should now be ready for the black pearl! [img src="http://www.howrse.com/media/sowcle/image/themes/default/smileys/
If you have any problems or questions, don't hesitate to PM me or post here; guests are welcome to post.